How to Install
All of our parts come standard in a white gel coat. They are not primed or painted. To prepare the parts for painting, lightly hand sand them to knock down the shine of the gel coat. From there you can prime and paint them as if they were a standard sheet metal body panel.
Watch & Learn

Installation Guides
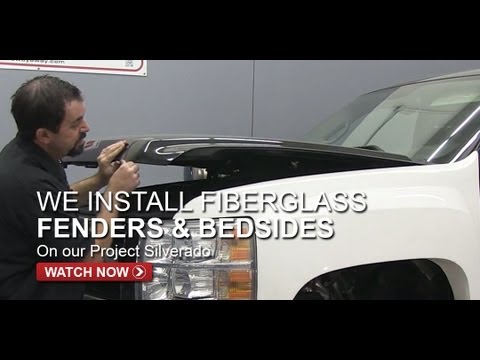
Installation will vary by model, but this general guideline will assist you in the process. Start by removing your existing OEM fenders. Be sure to save, and organize your OEM bolts as you remove them, they will be used in the installation process. We also like to run a few pieces of blue tape along the door jamb to protect the paint.
The first step is to remove the headlights. Behind the headlights there's typically a few fender mounting bolts that will now be accessible and will need to be removed. Next focus your attention on the hood/fender line, there's going to be 3-5 bolts in this area that will need to be removed. The next couple bolts are a little tricky; the first one is going to only be accessible from inside your cab. Open your door half way to gain access to this bolt and be sure to have a long ratchet extension handy. You'll need to get under the truck for the next bolt; it's in the lower most rear corner of the fender.
You'll need to now remove the inner wheel well liner from the fender. It's typically held on by clips, screws, or tabs. Chevy Silverado's and 80-96 F-150's are slightly different than all other installs — for these trucks you will need to split the outer fender from the inner fender by drilling out the spot welds around the perimeter.
To install your new fiberglass fenders, reverse the process! Drill out the mounting holes using a drill bit larger than the actual bolt size. This allows minor adjustments before you finalize and tighten down your fenders. Look at the body lines and door gap — you may need to push, pull or lean on the fenders to get them into the optimal position.
Consider removing your bed to start — while not required, it makes the process easier. Remove the tail lights and bumper. The factory bed skins are held on via numerous spot welds around their perimeter. We highly recommend using a spot weld cutter.
Once your factory bedsides have been removed, start by hanging your new fiberglass bedside over the bed rail. Use the body lines on the cab and the tail light as reference points for alignment. Once you're happy with the alignment, begin bolting the bedside into place — 4 evenly spaced bolts along the inner bed rail are sufficient, plus 2-3 bolts along the front flange, and a bolt or two around the tail light area.
The final step is to secure the front and rear portion of the wheel well. Use your existing factory supports for reference — it can be as simple as cutting and splicing the existing supports, or fabricating custom mounts. This step is critical — if not done properly it can lead to cracking.
Start by removing your hood and hood hinges — the new one piece will not use factory hinges. Remove your fenders (see fender section for reference), then mount your mini fenders using the factory mounting locations.
Set the rear of the hood onto the mini fenders and slowly lower the front down to the headlights. Use spacers at the front for proper alignment. Install your latches — the latch goes on the mini fenders, the clasp goes on the hood. Drill out the 6 mounting holes and rivet or bolt the latches to the fiberglass.
Hood pin placement is crucial: too far out and the center catches wind, too far in and the outside catches wind. The ideal spacing is roughly the width of your grille. Some vehicles let you mount directly to the radiator core support, others need risers.
Installing a custom dash is a great way to clean up the interior of your race truck. The inside of our dashes is a mirror image of the outside, leaving ample room for wiring and accessories. We leave a generous flange so you can trim to fit your specific vehicle layout.
There are no specific mounting points on the dash — fabricate mounting points off your cage work and/or cab. Simple tabs with dzus fasteners or fender washers are sufficient. If you're mounting a shifter to the dash, a steel or aluminum backing plate is recommended.
Need Help With Installation?
Our team is ready to help with any installation questions. Reach out and we'll get back to you.
Contact Us